Getting flawless color isn’t as hard as you think. Here are 5 tips to help your hair color look perfect:
1. Timing really is everything when it comes to achieving a balanced, cohesive color result.
Hair has different porosity at different sections. The more porous hair is, the faster it will absorb color and the darker your color result will be.
Think of your hair in three sections; Roots (new growth hair), Mid-lengths, and Ends. The least porous part of your hair is your new growth at your roots. Your mid lengths have increased porosity, and your ends will be the most porous part of your hair.
Roots: This is the newest, freshest hair so it takes a bit more time for the color to perform when coloring hair roots. Always begin your color application at your roots, and allow additional processing time to allow the color to fully absorb into your roots, which are naturally the least color absorbent section of your hair.
Mid-lengths: This hair is a little more porous, it has had time to be exposed to natural and unnatural elements such as sun exposure, coloring, highlighting, and heat styling. Increased porosity means faster color absorption, so your mid-lengths need less time to process the color.
Ends: The ends of our hair have been through the most and are the most porous section of your hair. Your ends probably feel the driest and they might be prone to split ends or frizz. They will also rapidly over-absorb color so you definitely do not need to leave the color on your ends for as long as your roots.
color will process faster at the ends, and color processing will slow moving up towards the roots. If you apply color to the full length of your hair all at the same time, you may have a darker, duller color result at your ends where the color has processed faster.
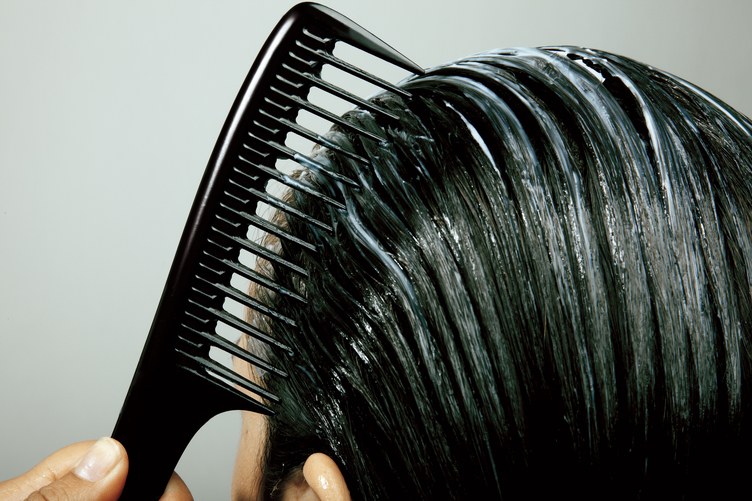
Adjust your color application to allow for the increasing porosity towards the ends of your hair. Give your new growth hair the most time to absorb color – give it at least a 20 minute head start – after that, gradually comb color down through hair adding more color to you mid-lengths, then finally on to the ends.
Consider adjusting your coverage and products for different sections of hair. If you have porous lengths, you can avoid applying permanent color again to your lengths, after an initial application. We call it color Perfection – more on that in a minute.
2. Total Saturation.
When doing a root touch up, total saturation is really important. Part your hair into 4 sections and apply color patiently and methodically, really massaging the color into the new growth hair so that you don’t miss any areas.
3. Know your limitations when going lighter. Say no to hot roots.
“Hot roots” is what you may get when you try to color your already-dyed hair a lighter color and the roots end up looking noticeably warmer than the rest of your hair.
Hot roots happen when the hair closest to the scalp lifts lighter and faster than the rest of the hair due to the heat coming off your scalp. This is also a result of putting a lighter shade on it and through the lightening process exposing natural warmth. Remember that “color cannot lift color,” so if you have any type of dye on your hair, applying a lighter color won’t be able to make your hair lighter – you’ll need a separate lightening process to achieve a lighter base color level.
4. Comb it down to escape the band.
When you color over hair that has been previously colored the hair color overlaps, creating a darker band where the new color is touching the previous color. You will usually see this band around your crown. Escape this by applying color just to roots and feathering down with a comb to the previously colored section.
5. Apply the right product in the right place
We talked earlier about how the different parts of hair absorb color at a different rate due to the porosity of the hair. When there is existing hair color in your hair, applying color over and over again leads to build-up, and darker, duller color outcomes of the lengths of your hair.
If your lengths are porous, particularly dry or damaged, try our color Perfection coloring approach. This approach applies permanent color to the hair once only. Permanent color is never applied to the lengths (apart from your very first application with a new color, to achieve full length coverage).
Our color Perfection approach blends color cream with either a 20 or 27 vol developer for either standard or intensive permanent color coverage at your roots only. The 27 vol developer can cover colour-resistant grays, or achieve up to three levels of lift.
Boost the color, tone and shine in your lengths with either a toner or semi-permanent color. Our gentle 5 vol will deposit tones only, and can be blended with any of our colors to boost the tone and shine of your hair. 5 vol is a no lift developer, which gently deposits tone, and can be used to boost color in your lengths while avoiding a permanent color application in your lengths.
Applying permanent color only where you need it will preserve the condition of your hair in your lengths, as well as avoid color build-up.
I absolutely love The Shade, there is no nasty smell or harsh feeling and my hair looks and feels great. It has really helped the condition of my hair. I also adore the shampoo and conditioner and all the other extras that are included- thank you so much.
D. Demouce
Was so amazed at how good this turned out. Best home dye I’ve every used. Will never go to the salon for color again.
Alice Ward
I love, love, love The Shade. I love that it’s so conveniently delivered to my door and I love how good my hair feels after use. Highly recommend The Shade to anyone considering trying, just do it, you won’t be disappointed.
Leonie Cook
If I I’m just using half solution to touch up roots, do I still put the developer on first to prepare hair for colouring?
Hi Brenda! If you are pre-softening to colour stubborn greys, then yes, you can do that before the colour process. Make sure that you mix exactly half the colour tube with half a developer sachet when you colour, because the quantities need to be correct for the colour to activate properly. I hope that helps and that you are happy with your colour result!